Statamic is a pretty cool Laravel-based CMS for creating creative-looking sites.
Deploying a Statamic site with Cleavr is very straightforward.
In this guide, we’ll work through the first section of Statamic’s quick start guide.
Install Statamic on local
If you don’t want to install on your local; no problemo! Skip this step and you can use my GitHub repo instead.
Referring to the quick start guide, we’ll install the example app using Composer in our ~/Sites folder.
Installing Stamatic will almost certainly fail due to a memory allocation error. If you haven’t already increased your PHP memory limit, then you’ll want to do that. The following is a great guide on how you can adjust the memory_limit setting: https://www.chapterthree.com/blog/how-fix-composer-memory-issue
Once successfully installed, you should be able to preview on your local via http://cyberspace-place.test. If you don’t have Valet installed and running, no worries. We’ll mainly be pushing this to prod and then will work more from there.
Add your project to GitHub / Bitbucket / GitLab.
Deploy via Cleavr
Let’s now deploy using Cleavr!
I’m gonna cheat a little bit and use Cleavr’s new Flash Deploy feature that isn’t released at this time. (though, this feature will be out VERY soon  ).
).
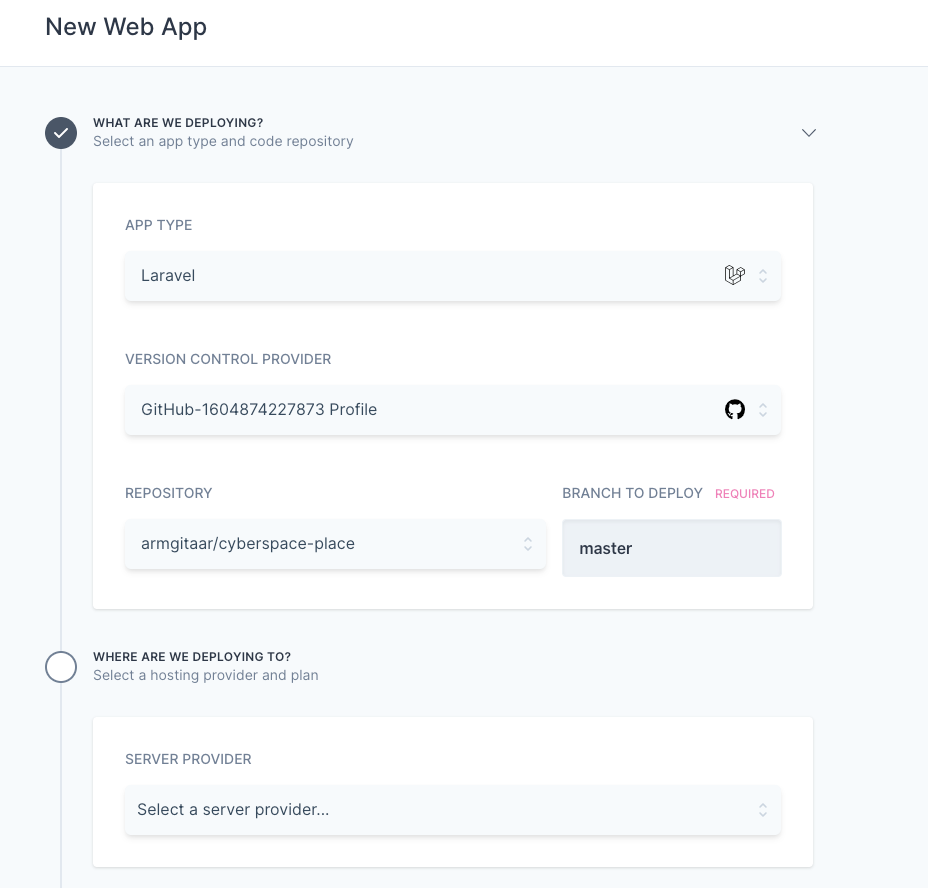
When setting up the app type, be sure to select Laravel and also install a MySQL database server.
Feel free to use my repo https://github.com/armgitaar/cyberspace-place to deploy from.
Flash deploy, in fell-swoop, will -
 Provision a new server
Install app dependencies
Create new site
Deploy the site
Once complete, you should see -
Add a user
If you click on Control Panel, you will see the login screen. We’ll need to SSH into the server and add a new user to login with.
In Server > SSH
Add your SSH key, make sure to apply to root user. Once added, copy your server’s public IP address, and then SSH into the server via your terminal.
ssh root@<public ip>
Once in your server, head over to
cd /home/<site name>/current
And then run the commands to create a new super user per the Quick Start commands.
php please make:user

Now, head to http://flash-uitahtlpvg.lamejunk.com/cp/dashboard to login.
Note - if you get a 500 error after attempting to login; it’s likely a cache issue. You can clear the cache by modifying the webapp > env and enabling clear cache option. Or, just redeploy. The deployment is pretty quick.

That’s it! Pretty easy. 
– TROUBLESHOOTING –
Some users with older Statamic versions experienced circular issues during deployment on the install composer step. If you have this issue, SSH into your machine and install version 1.
composer self-update --1